Have you ever found yourself frustrated while using the Blender software, trying to position objects or elements within your 3D model with utmost precision? Well, fear not! The Blender 3D Cursor to Center feature is here to save the day. In this blog post, we will explore this amazing tool, uncover its hidden gems, and master the art of precision in Blender.
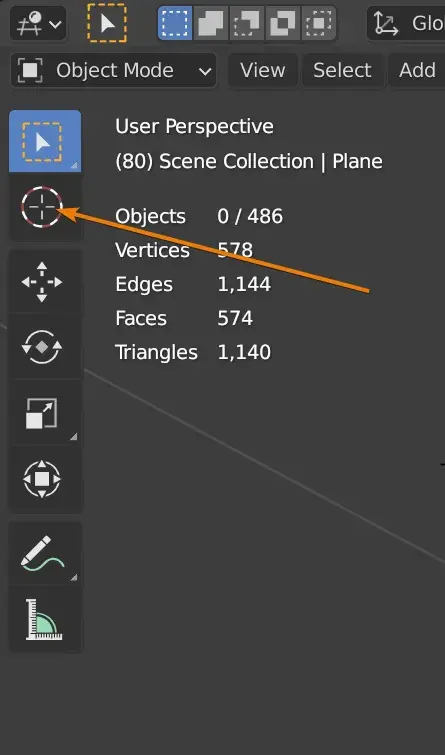
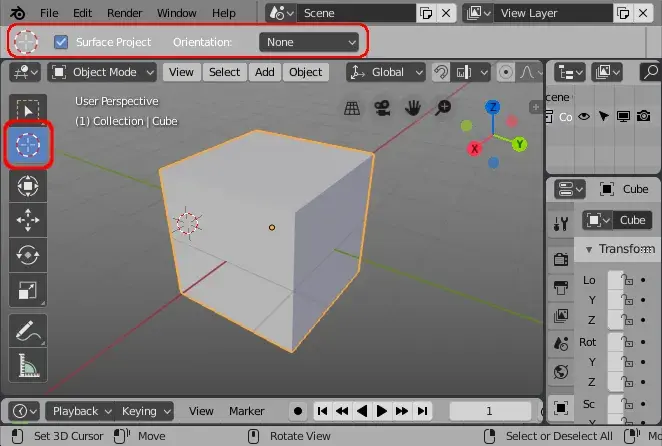
The 3D cursor is a tiny but mighty tool in Blender that allows you to set the position and orientation for new objects, transformations, and manipulations. It serves as the focal point for many tasks, acting as a guide for precise placement in your 3D scenes. However, sometimes we find ourselves with the need to align or move objects precisely to a certain point or center. That's where the Blender 3D Cursor to Center comes into play.
To begin our journey into the wonders of the Blender 3D Cursor to Center, let's first understand how to move the 3D cursor to the center of our workspace.
The shortcut to move the 3D cursor to the center is **Shift + C**. By pressing these keys, the 3D cursor instantly snaps back to the center of the scene. It's like hitting the reset button, letting you start anew with a clean slate.
But what if you want to move the 3D cursor to the center of a specific object? Fear not, for Blender has you covered. Follow these steps:
2. Press **Shift + S**.
3. In the popup menu, choose **Cursor to Selected**.
Like magic, the 3D cursor is now at the center of the selected object. This feature comes in handy when you want to precisely align multiple objects or create symmetrical designs.
Now that we have mastered the art of moving the 3D cursor to the center, let's explore how it can enhance our object manipulation skills.
By default, Blender rotates objects around their own origins. However, sometimes you might want to rotate an object around a specific point in your scene. Enter the 3D Cursor.
To rotate an object around the 3D cursor, follow these steps:
2. Select the object you want to rotate.
3. Press **Period (.)** on your keyboard.
Congratulations! You have now unlocked the power of precise rotation around the 3D cursor. This technique is extremely useful, especially when you want to create complex animations or intricate designs.
The 3D Cursor to Center also plays a crucial role when it comes to scaling and transforming objects. When you scale an object, it usually scales around its own origin. However, you can leverage the 3D Cursor to scale objects from a different point.
To scale an object from the 3D cursor, follow these steps:
2. Select the object you want to scale.
3. Press **Period (.)** on your keyboard.
4. Scale the object as desired.
Voila! You now have the ability to scale objects with precision around any point in your scene. This technique is particularly useful when working with symmetrical designs or adjusting specific object parameters.
The Blender 3D Cursor to Center feature also allows you to snap and align objects in your scene with ease. This can be incredibly useful when you need to place objects in specific locations or align them with other elements.
To snap an object to the 3D cursor, follow these steps:
2. Select the object you want to snap.
3. Press **Shift + S** and choose **Selection to Cursor (Offset)**.
Now your object is perfectly aligned with the 3D cursor. This technique is essential when you want to create grids, formations, or layouts that require precise alignment.
In conclusion, the Blender 3D Cursor to Center feature is a game-changer when it comes to achieving precise positioning and alignment within your 3D models. From moving the 3D cursor to the center of your scene or a specific object, to leveraging its power for precise rotations, scaling, and snapping, this tool is a must-have for any Blender artist.
Remember, mastering the art of precision takes time and practice. So, don't be discouraged if it feels a bit overwhelming at first. Embrace the power of the 3D Cursor to Center, experiment with its capabilities, and unlock a whole new world of possibilities in your Blender workflow.
So go ahead, dive into Blender, and let the 3D Cursor be your guide to precision and perfection. Happy blending!
Moving the 3D cursor to the center of an object is a simple yet powerful technique that can greatly enhance your 3D workflow. By placing the cursor at the object's center, you gain a precise reference point for various operations, such as scaling, rotating, or creating new objects. To accomplish this in Blender, follow these steps:
2. Press Shift + S to open the "Snap" menu, then select "Cursor to Selected."
3. Voilà! The 3D cursor magically jumps to the center of your selected object.
With the 3D cursor comfortably nestled at the heart of your object, you can efficiently perform tasks that require pinpoint accuracy. This technique is indispensable, especially when working on complex scenes or intricate models. Enjoy the newfound precision and ease it brings to your 3D adventures!

